
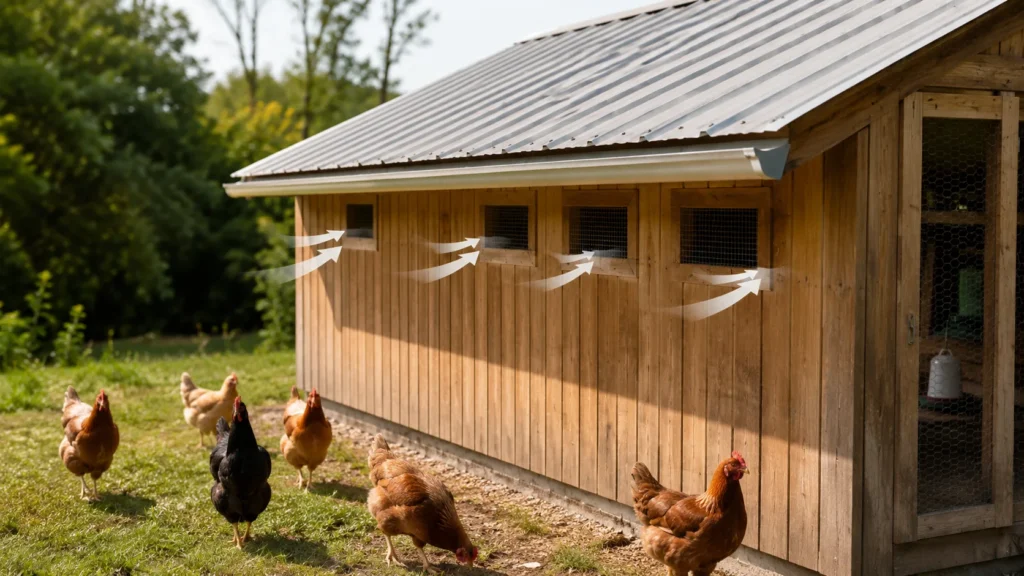
Chicken coop ventilation should remove moisture, ammonia, and stale air without creating a draft at roost height. The best setup is high, continuous airflow near the roofline, with solid winter protection where your hens sleep. In practice, that means more open vent area than most beginners expect, but placed so cold air does not blow directly on the birds.
This guide explains how chicken coop ventilation works, how to size and place vents, and how to troubleshoot common problems in real backyard coops. It is for beginners building a coop, upgrading an existing coop, or trying to solve damp litter, ammonia smell, or winter condensation.
What Makes Chicken Coop Ventilation Work?
Healthy coop air is mostly about moisture control. Chickens breathe out water vapor, droppings release ammonia, and wet bedding creates humidity fast. If that moisture has nowhere to go, it condenses on walls and ceilings, then drips back into the coop and raises the risk of frostbite, respiratory stress, and dirty litter.
The goal is not to make the coop warm like a house. Chickens handle cold well when they are dry and out of drafts, but they do poorly in damp, stagnant air. Good ventilation keeps fresh air moving through the upper part of the coop while the roost area stays calm.
Think of ventilation as exhaust, not wind. Openings near the top let warm, moist air escape naturally, while lower openings are more likely to create drafts where hens rest. A useful non-obvious tip: a coop that smells “fine” when you open the door may still be under-ventilated if the litter is damp or the windows fog up on cold mornings.
The Core Chicken Coop Ventilation Setup
The most reliable setup is a combination of high wall vents, ridge-style airflow, or protected openings under the eaves. Keep the openings above the roost level whenever possible. If you need to use larger openings, cover them with hardware cloth so air can move but predators cannot.
| Item | Amount/Spec | Why it matters |
|---|---|---|
| High vents | Placed near the roofline or under eaves | Lets warm, damp air exit before it condenses inside the coop |
| Protected openings | Covered with 1/2-inch hardware cloth | Keeps raccoons, snakes, and other predators out |
| Roost placement | Below vents, away from direct airflow | Prevents drafts on sleeping birds |
| Dry bedding | Clean, absorbent litter managed regularly | Reduces ammonia and keeps humidity from building up |
| Weather protection | Solid roof, rain shield, or overhang | Allows airflow without letting rain or snow blow in |
| Cross-vent path | Openings on more than one side when possible | Helps stale air leave instead of sitting in corners |
As a rule, vent openings should be generously sized and adjustable if your climate changes a lot. Many coop problems come from making vents too small, then trying to compensate with more cleaning or more bedding. In reality, the right airflow reduces both chores and odor.
Step-by-Step Chicken Coop Ventilation Plan
1. Map the moisture sources: Start by identifying where dampness comes from. Look at waterers, droppings under roosts, wet litter near doors, and any roof leaks. If you solve only the smell but ignore the water source, the coop will keep getting humid.
2. Put vents high on the walls: Install openings near the top of the coop, not near the floor. Warm, moist air rises, so upper vents are the easiest way to vent it out naturally. Keep roosts below these openings so birds do not sleep in direct airflow.
3. Add predator-proof screening: Cover every vent with welded wire or hardware cloth, not chicken wire. Raccoons can tear through weak mesh, and gaps around openings can become entry points. Secure the screen with exterior fasteners so it cannot be pushed inward.
4. Balance airflow with shelter: Provide enough open area for exchange, but keep rain, snow, and prevailing winter winds out. A deep roof overhang, partial wall, or hinged storm panel can make a big difference. The birds need moving air, not a wind tunnel.
5. Test the coop on a cold morning: Step inside after sunrise and check for condensation, strong ammonia smell, and wet surfaces. The CDC/NIOSH guidance on respiratory irritants reinforces why ammonia and poor air quality matter, even in small animal spaces. If you smell ammonia at nose level, the coop needs more airflow or drier bedding.
6. Adjust for season, not just weather: Summer often needs more open ventilation to move heat and humidity out. Winter still needs air exchange, but the openings should be positioned so hens can stay dry and out of drafts. The best setups work year-round with small adjustments, not seasonal rebuilds.
7. Recheck after every cleanup: When you change bedding or wash the coop, confirm that vents are still open and unobstructed. Cobwebs, dust, and nesting material can block airflow over time. A quick monthly inspection prevents most ventilation failures before they turn into flock health issues.
How Much Chicken Coop Ventilation Do Chickens Need?
Chickens need more ventilation than many new keepers expect, especially if the coop is tightly built. The safest answer is: enough open upper area to keep the coop dry and ammonia-free, while preserving a calm roost zone. In a small backyard coop, that often means vents on multiple sides rather than one tiny window.
The right amount depends on coop size, flock size, climate, and bedding management. A coop packed with birds or using deep litter needs more airflow than a roomy coop with fewer hens. For sizing help, compare your coop plan with how big a chicken coop should be and keep the air exchange in scale with the number of birds inside.
| Option | Best for | What to expect |
|---|---|---|
| Small high vents | Mild climates and compact coops | Simple, low-cost airflow if the vents are large enough |
| Continuous eave vents | Year-round use | Steady moisture release with less draft risk |
| Window-style openings with screens | Hot climates | Strong airflow, but needs weather protection |
| Adjustable panels | Regions with sharp seasonal changes | More control, but more parts to maintain |
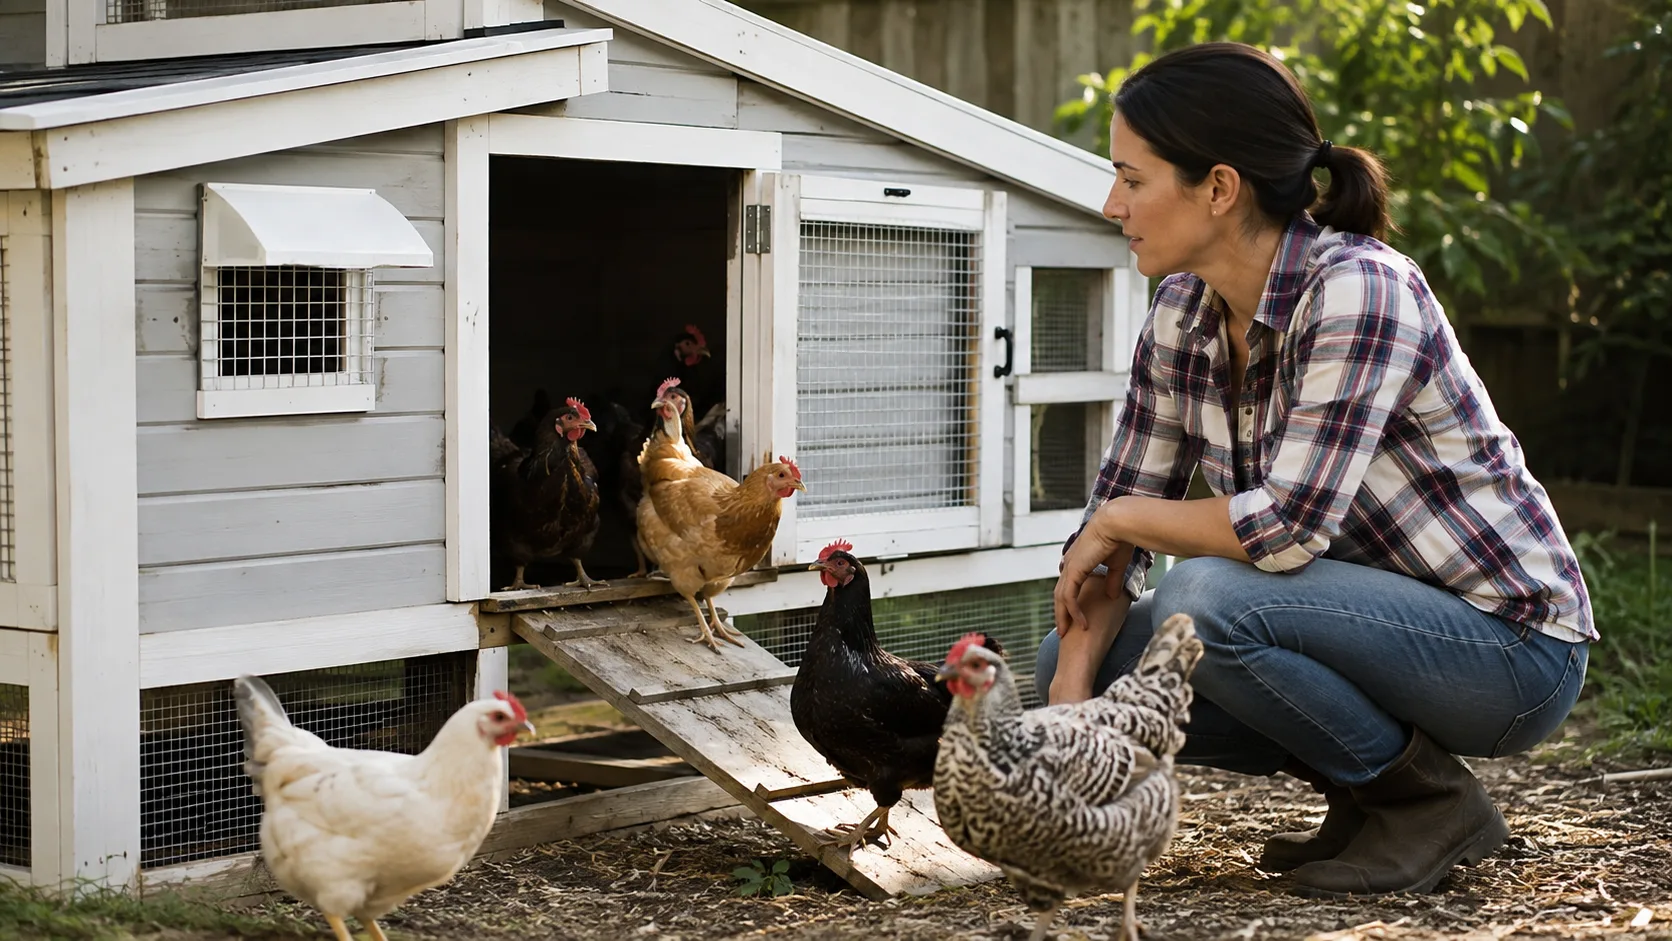
For a small backyard coop:
Focus on upper vents, not extra floor-level openings. Small coops can build up moisture quickly because the air volume is limited. If the coop is compact, keeping bedding dry and roosts clean becomes just as important as the vent design.
For a cold-winter climate:
Keep airflow high and direct it away from the birds. Closed-in coops often get more frostbite and respiratory problems from damp air than from cold temperatures alone. Use wind blocks on the weather side, but do not seal the coop airtight.
For a hot, humid climate:
Prioritize larger open areas and cross-ventilation. Heat stress is a bigger concern, so moving air matters more than conserving warmth. Make sure every opening is fully screened and shaded from rain.
For a mobile or tractor coop:
Mobile coops often have less interior moisture buildup, but they still need upper airflow. Because these coops are moved often, check that screens, hinges, and roof edges stay intact after transport. A loose vent panel can quickly become a predator problem.
For an older coop retrofit:
If the coop was built too tight, add vents under the eaves before cutting larger openings low on the walls. Retrofitting high is usually safer and easier than rebuilding roosts or doors. Start small, test for a week, then expand if needed.
Related Setup Advice
Ventilation works best when the rest of the coop is built for comfort and easy maintenance. If you are still planning the inside layout, review chicken nesting boxes so you can keep nests dry, private, and away from the dampest parts of the coop.
You may also want to compare airflow planning with how to clean a chicken coop, because routine cleaning and ventilation solve many of the same problems from opposite angles. A well-ventilated coop still needs regular bedding changes, but the job will be faster and the odor lighter.
Common Chicken Coop Ventilation Problems and How to Fix Them
| Problem | Likely cause | Easy fix |
|---|---|---|
| Strong ammonia smell | Not enough air exchange or wet litter | Add high vents and replace damp bedding |
| Condensation on walls | Moist air trapped inside the coop | Increase upper ventilation and reduce crowding |
| Drafts on roosts | Openings placed too low or too close to roosts | Redirect airflow upward and block direct wind paths |
| Wet bedding near the door | Rain blowing in or poor drain-off outside | Add an overhang, threshold, or splash protection |
| Dusty, stale air | Too little cross-flow and too much dry litter dust | Improve air movement and rake bedding regularly |
| Winter frostbite concerns | Damp air and cold surfaces inside the coop | Keep vents open high up and keep the coop dry |
Most ventilation problems are really moisture-management problems. If you fix airflow but keep spilling water, overstocking birds, or letting litter stay wet, the coop will still be unhealthy. Start with the air path, then clean up anything that keeps adding humidity.
Chicken Coop Ventilation and Long-Term Maintenance
Good ventilation lasts only if you maintain the openings and the surfaces around them. Check for clogged screens, loose fasteners, roof leaks, and insulation that accidentally blocks airflow. A seasonal inspection is usually enough for most backyard coops, but humid climates may need more frequent checks.
For long-term coop hygiene, it helps to follow general poultry care guidance from Penn State Extension on keeping animal housing dry, clean, and properly ventilated. Even if your coop looks sturdy, small gaps, wet corners, or blocked vents can slowly undo the design. The less moisture that stays inside, the longer the wood, bedding, and hardware will hold up.
If you use removable storm panels or winter covers, store them dry and reinstall them before wet weather returns. A vent that works in July may need a different opening pattern in January, but it should never be fully sealed for long. The right maintenance keeps the coop breathable without turning it drafty.
Frequently Asked Questions
Should a chicken coop be airtight in winter?
No. A coop should stay dry and protected, but not airtight. Chickens add moisture to the air every night, and that moisture needs a way out even in cold weather.
Do chickens need windows for ventilation?
Windows can help, but they are not required if the coop has well-placed upper vents. If you do use windows, screen them and make sure they do not create a direct draft over the roosts.
Where should coop vents be placed?
The best placement is high on the walls or under the eaves. That lets warm, moist air escape while keeping the birds out of direct wind.
Can too much ventilation hurt chickens?
Yes, if it creates a draft where the birds sleep. The problem is not open air itself, but air aimed straight at roosting hens or rain blowing into the coop.
How do I know if my coop has enough ventilation?
Look for dry bedding, low odor, and little or no condensation. If you smell ammonia, see damp walls, or find wet litter often, the coop probably needs more airflow.
Should I close coop vents at night?
Usually no. Closing vents traps moisture and worsens air quality. It is better to keep vents open high above the birds and block wind only where needed.
A Dry Coop Is a Healthy Coop
Chicken coop ventilation is one of the simplest upgrades you can make, and it affects almost everything else in the coop. When air moves correctly, bedding stays drier, odor drops, and hens are less likely to deal with cold-weather moisture problems.
If you are planning a new coop or fixing an old one, start with airflow before you worry about extras. For more practical chicken-keeping advice from Cedar & Cluck, visit Cedar & Cluck and build a coop that works for real hens, not just a blueprint.
